An entity can have a number of properties and sometimes you want one entity to have the
same properties as another entity. Here is a tool that you can use to get the job done
quickly. Most Microsoft Office users already know about the Format Painter tool that
they can use to apply properties of one object to another. CADopia includes a similar
tool called Property Painter. This tool is very handy for transferring property settings
from one entity to another. The icon for Property Painter is shown below.
![]()
What is less commonly known is that you can define which properties get transferred by
this tool, giving you more control over this versatile tool. You don’t have to use a separate
tool to match only layer, for example. This tool with the right settings can do the same task.
Click on the Property Painter icon or type propertypainter on the command line to
activate the Property Painter tool.
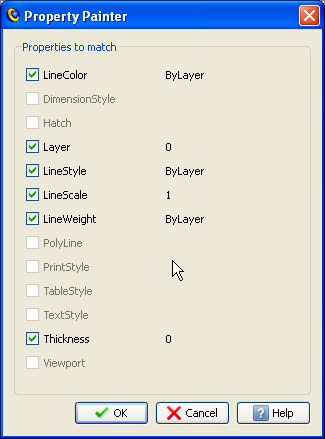
Type S to set the settings in the Property Painter settings dialog box:

To copy properties between entities:
- Click Modify > Property Painter (or type PropertyPainter on the command line or click the
Property Painter icon). - Specify a source entity with the properties you want to ‘paint’ to other drawing entities.
- To specify a subset of the properties to be copied, type Settings at the command prompt.
- In the Property Painter settings dialog box, select the properties to be copied, clear the properties
you do not want copied, and click OK.
By default, all basic properties except PrintStyle are selected.
Specify the entities the properties are to be copied to.
You can copy and paste the following basic properties between all entities:
- Layer
- LineColor
- LineStyle
- LineScale
- LineWeight
- Thickness
- PrintStyle
You can copy and paste these special properties between specific types of entities:
- Dimension – DimensionStyle
- Text – TextStyle
- Table – TableStyle
- Hatch – Hatch pattern and Hatch settings
- Polyline – Width and LineStyle generation properties
- Viewport – Includes snap, grid, display locking, scale (standard or custom), shade plot,
and coordinate symbol icon settings of a Sheet Viewport
Selecting these options applies the properties of the source entity to
destination entities of the applicable type. For example, if the source entity is Text,
the TextStyle is applied to all Text entities in the selected destination entities.
You can, of course, change the settings to suit your requirements. If you want to
change the target objects to match the source object’s layer, but don’t want to affect
the linetypes; uncheck the Linetype property. Or, if you want to apply the Hatch layer
from one Hatch to another, but don’t want to change the existing Hatch pattern; uncheck the
Hatch box.
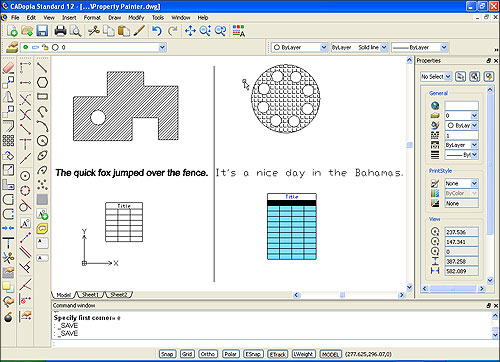
Open the file Property Painter.dwg (Download Property Painter.dwg).

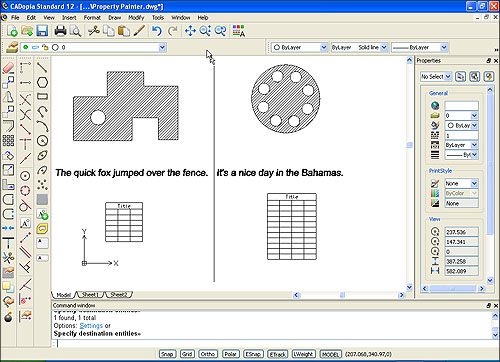
Select Property Painter tool. Select the hatch pattern on the left as the source entity,
select the hatch pattern on the right as the destination entity. The hatch on the right
inherits the properties of the hatch on the left.
Select Property Painter tool. Select the text on the left as the source, select the text
on the right as the destination entity. The text on the right inherits the Text Style
of the text on the left.
Select Property Painter tool. Select the table on the left, select the table on the
right as the destination entity. The table on the right inherits the Table Style of
the table on the left.
The new drawing looks as follows:

