Creating Custom Drawing templates in CADopia
Each organization has its own drawing standards with specific linestyles, hatch patterns, dimension and text styles, and other drawing elements.
A new drawing in CADopia has only a few standard elements pre-loaded — a default Continuous linestyle, a basic set of colors, a default layer 0, standard hatch patterns, etc.
However, it is easy to pre-populate the drawing with the elements that are the standards within your organization using drawing templates.
Drawing templates save time as you create the custom template once and then you use the same template for all your drawings, without loading the drawing elements for each drawing manually.
Steps to create a custom template:
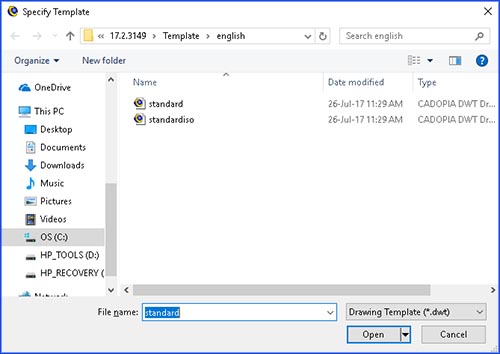
- From the file menu, click New.
- Change the file type to .dwt
- Pick the default standard (ANSI) or standard ISO template based on your requirements.
- Start adding the drawing elements that you need for your custom template.
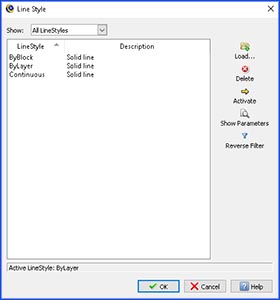
- Click on Load linestyles.
- In the Load Linestyles dialog box, select the linestyles you want pre- loaded in your drawings.
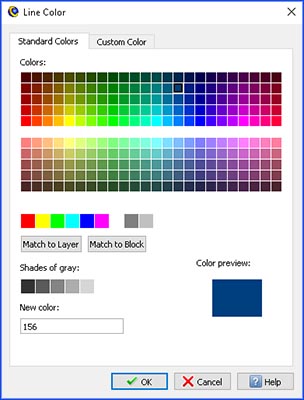
- You can also add custom color that you use frequently.
- After adding the drawing elements, save the file using SaveAs, assign it a name.
- You have now created a custom template file.
- Now, create a new drawing using the New tool from the toolbar, or by typing new on command line or picking New from the ribbon.
- Select your custom template file.
For example, you can add linestyles. You can also add dimension styles, lineweights, and other drawing elements.


Your custom template file name shows up in the list of templates to use for creating this new drawing.
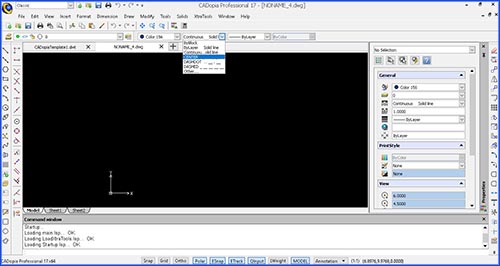
All your standard drawing elements are pre-loaded in your drawingfile. Verify that the linestyles are available as shown below.
Custom templates saves time, start using them!